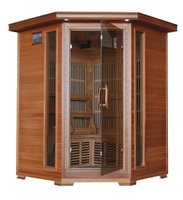
There are 6 easy steps to change the circuit board in your Heatwave sauna.

- To access the circuit board for the power box, you will need to remove the roof panel access. It is a thin piece of wood that covers the top part of the roof panel. Remove the outer screws that secure it in place. Once removed, the roofs electrical components will be exposed.
- Locate the gray box mounted to the roof panel. This is the power box. Remove the lid on the power box by undoing the screws on the corners of the lid. To remove the circuit board it will be easiest to unscrew the power box from the sauna roof. Remove the 4 screws on the corners of the power box. Once removed, you can identify the circuit board as the green board with the red and white wires that connect to it.
- To remove the circuit board for the power box you will need to unscrew the 4 nuts and bolts located on the 4 corners of the circuit board.
- Once the circuit board is separated from the power box, begin to switch out the wires from the circuit board to the new replacement board. It is important to do one wire at a time to make sure no wires are crossed during this step. Once all the wires are transferred to the new board, the circuit board can be reattached to the power box using the nuts and bolts. Be sure to reuse the white spacers underneath the circuit board when securing the board in place.
- The replacement circuit board will come with a white thermostat connection attached to the board. Feed the thermostat connection through one of the openings in the power box.
- Secure the box to the roof panel using the 4 screws you removed in Step 2. Place the lid back on the power box and secure using the same screws that were removed.


